Starting a Jetstream Computer Instance!
Starting a Jetstream Computer Instance!
Here we describe the process of starting up and managing a Jetstream service virtual machine instance.
Below we walk through the process of starting up and accessing a Jetstream instance (a.k.a a computer in the cloud) . To begin with, just think of it like requesting and loging-in to a brand new remote computer. We have provided screenshots of the whole process that you can click on to see a larger version. The important areas to fill in are circled in red.
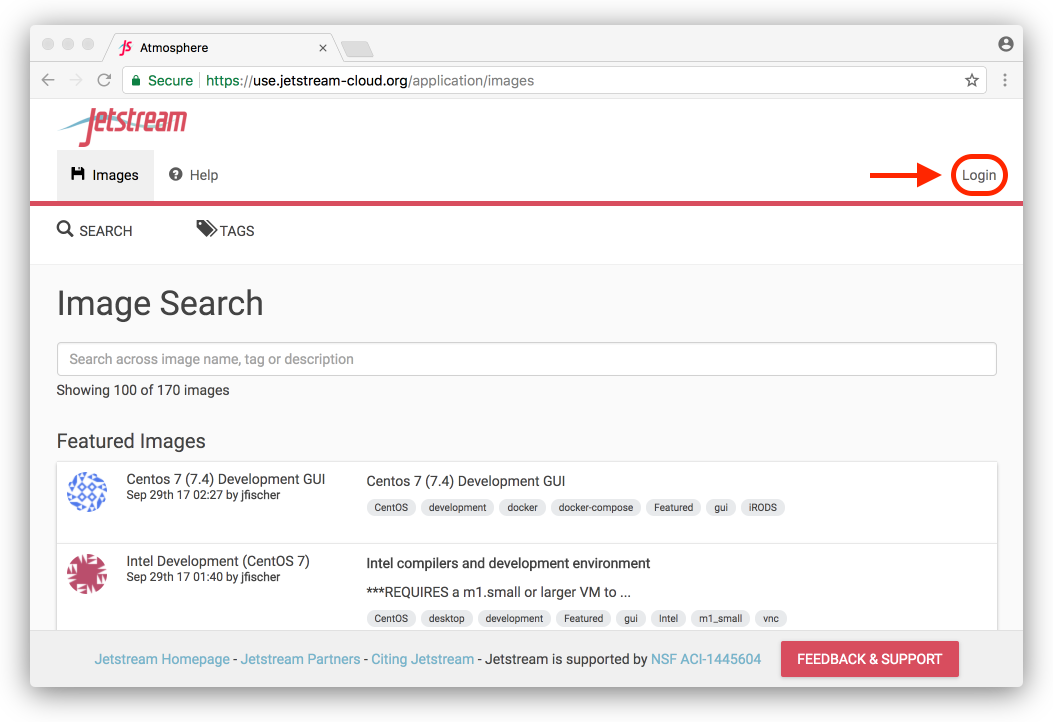
Request to log in to the Jetstream Portal
First, go to the Jetstream application at:
https://use.jetstream-cloud.org/application.
Now click the login link in the upper right.
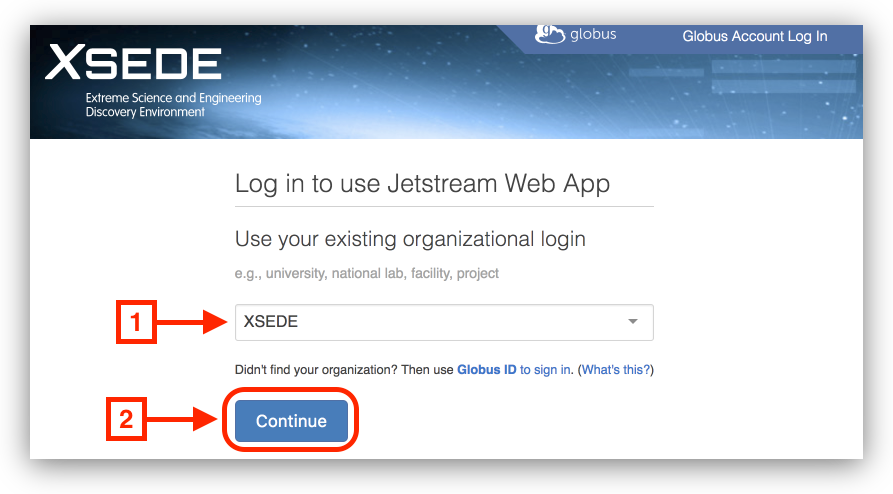
Use “XSEDE”
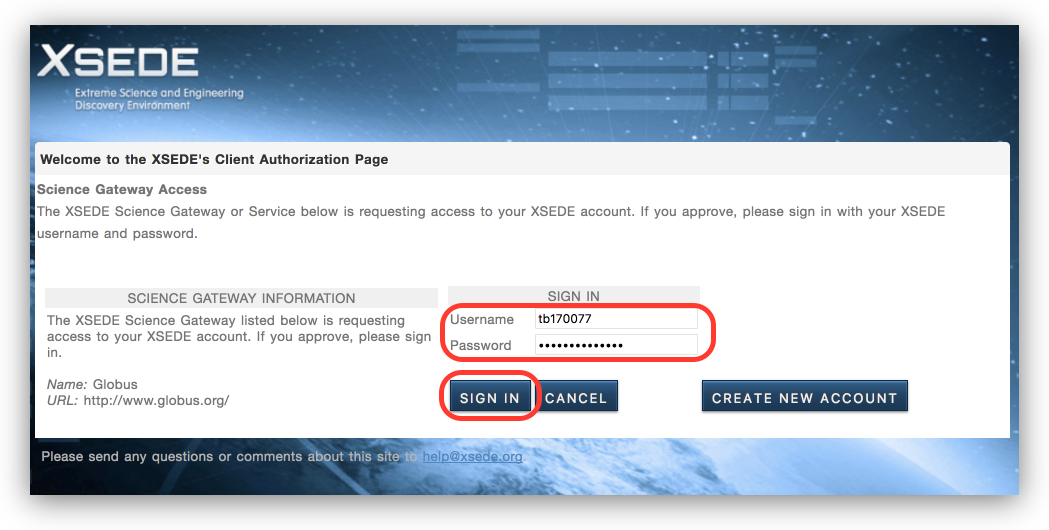
Choose “XSEDE” as your account provider (it should be the default) and click on “Continue”.
Fill in the username (tb170077) and password and click “Sign in”
Fill in the username, which is ‘tb170077’ for the Fall 2017 BGGN-213 class, and then enter the password - which we will tell you in class (simply ask Barry if you have forgotten).
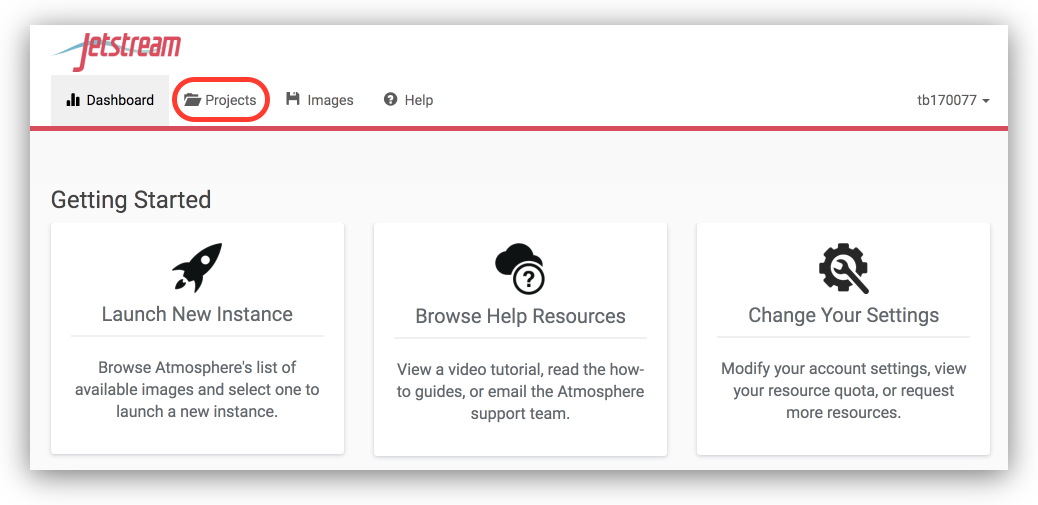
Select Projects and “Create New Project”
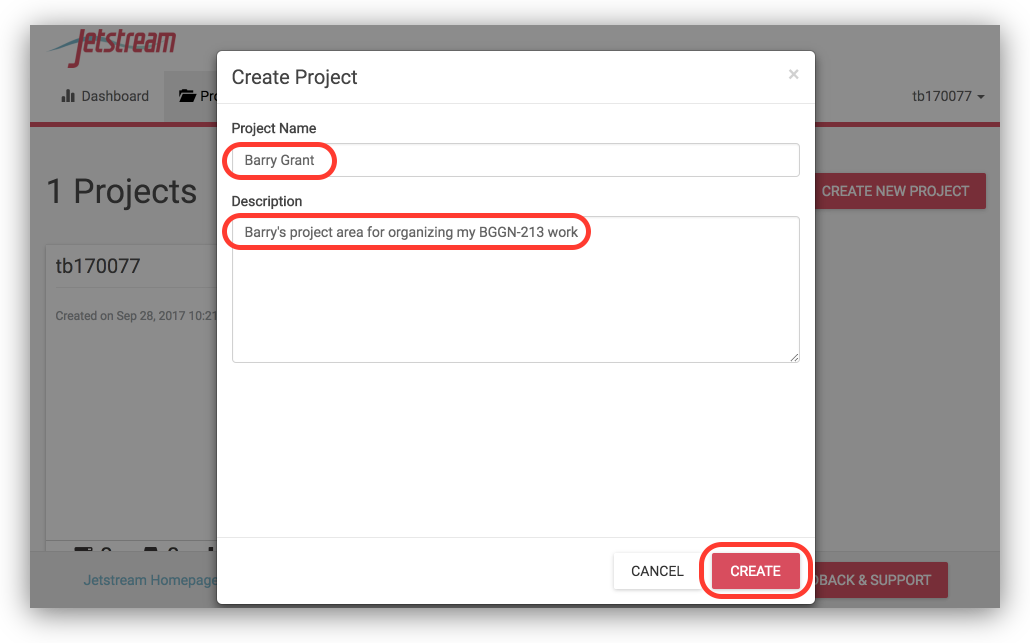
Now, this is something you only need to once if you have your own account - but if you’re using a shared account like tb170077, you will need a way to keep your computers separate from everyone else’s.
We’ll do this with Projects, which give you a bit of a workspace in which to keep things that belong to “you”.
Click on “Projects” up along the top.
Name the project for yourself and click “create”
Enter your name into the Project Name, and something simple like “BGGN-213 class 4” into the description. Then click ‘create’.
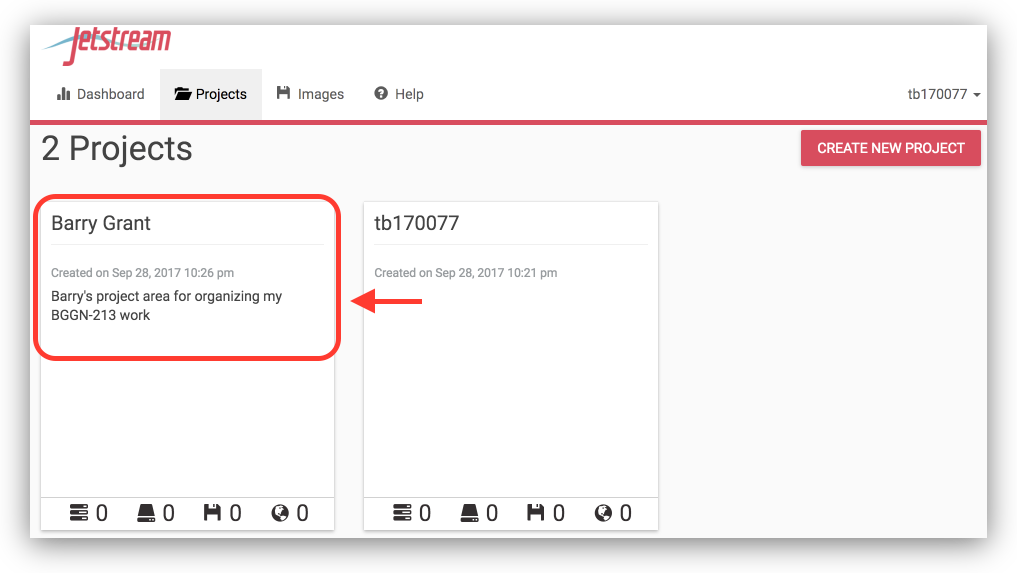
Select the newly created project
Click on your new project!
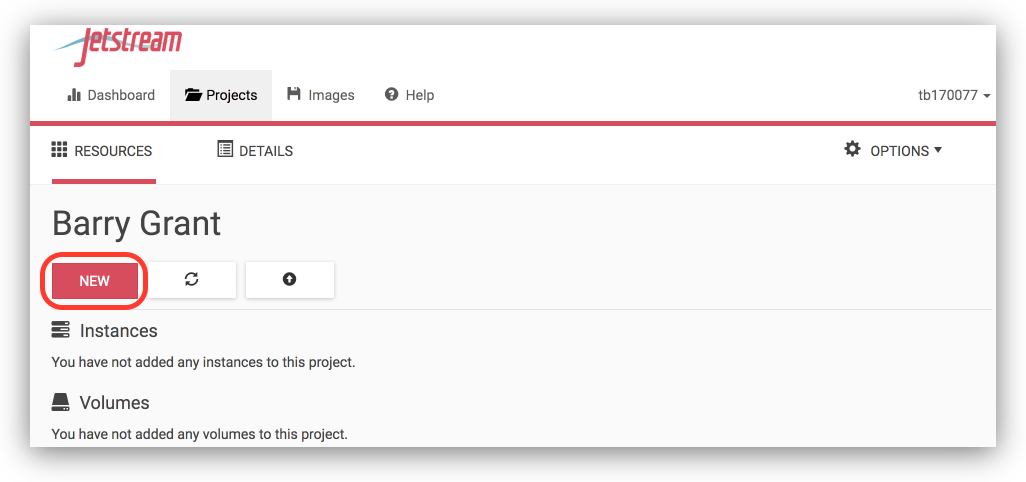
Within the project, select “new”
Now, select ‘New’ and then “Instance” from the dropdown menu to start up a new machine.
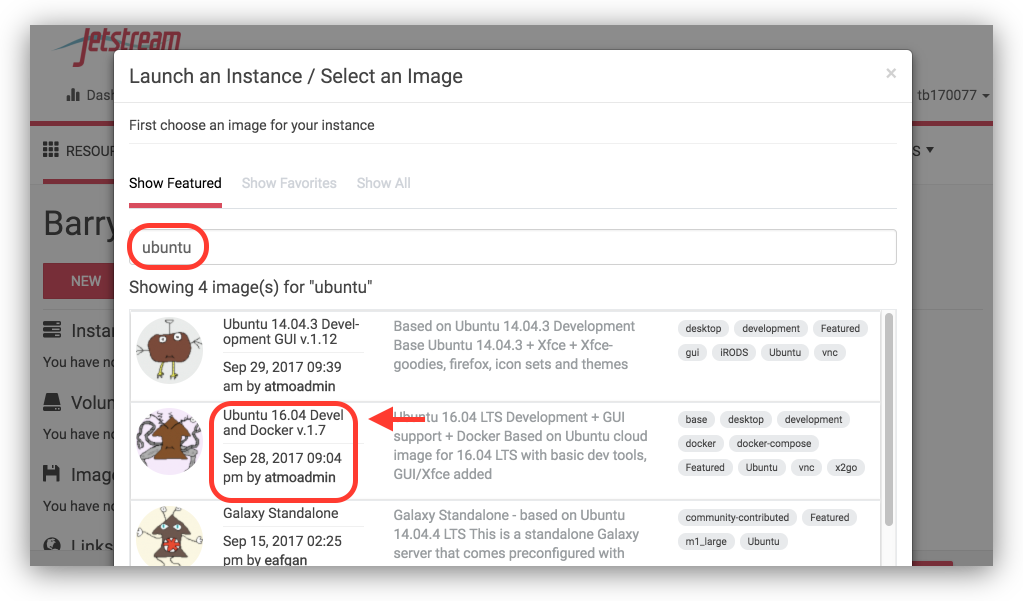
Find the “Ubuntu 16.04” image, click on it
Enter “Ubuntu 16.04” into the search bar - make sure it’s from Sept 28th, 2017 (or later).
Note Some of the details may vary here – for example, the name of the operating system or “image” (i.e. type of computer) you want to request may vary from “Ubuntu 16.04” to something else (like Galaxy Standalone) depending on the lecture/class session requirements.
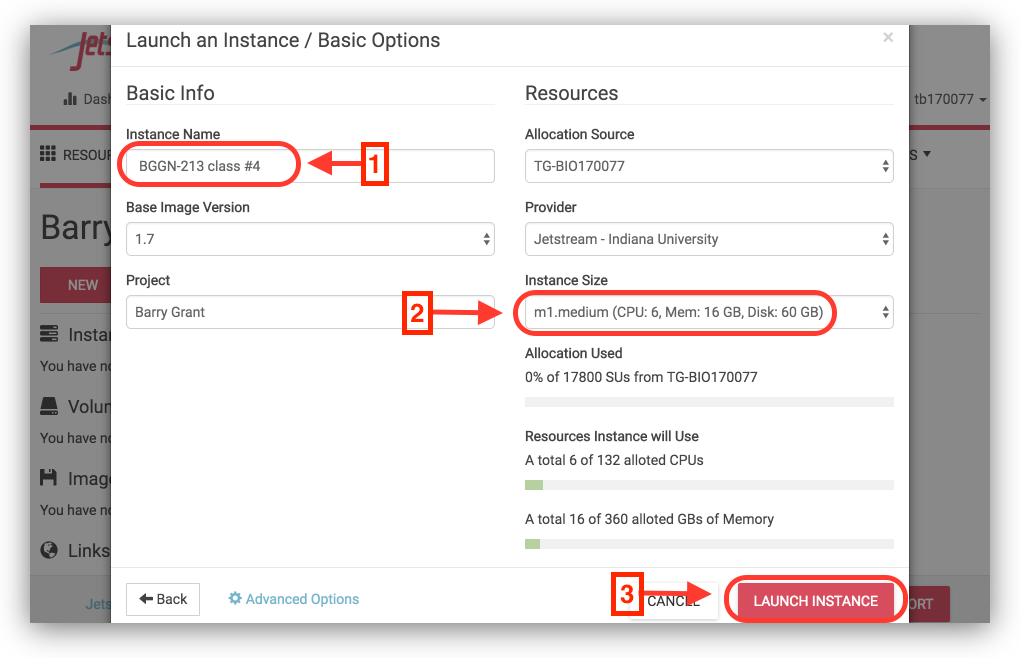
Name it something simple and select ‘m1.medium’
Change the name to reflect what we are are going to do - For example, “BGGN-213 class no. 4” (labeled as step 1 below), select ‘m1.medium’ (step 2 below) and finally click ‘LAUNCH INSTANCE’ (step 3 below).
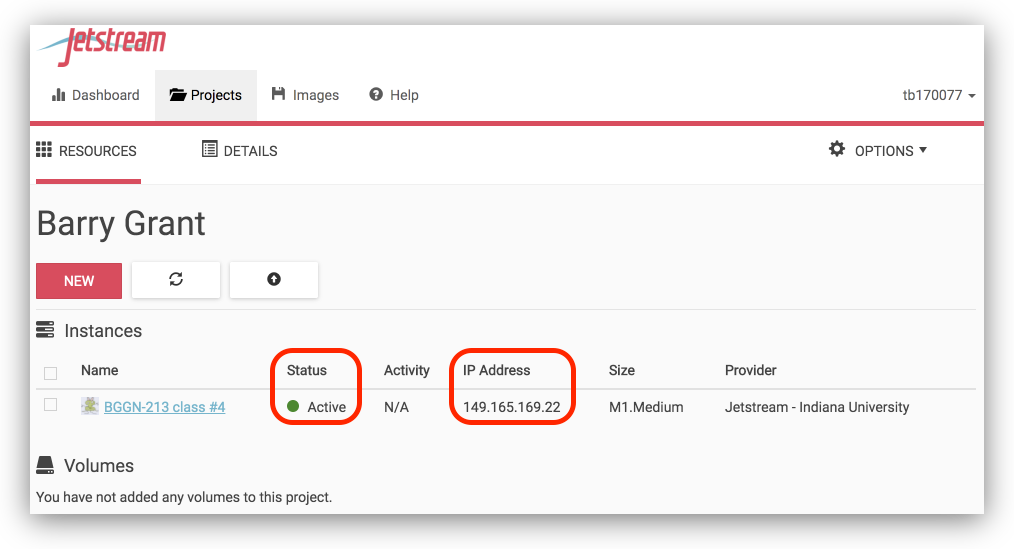
Be patient and wait for it to become ‘active’
It will take some time to build, boot up, and network and deploy your requested instance. Often between 5 and 10 minutes but occasionally longer during busy times. Please just wait! and DO NOT RELOAD ANYTHING.
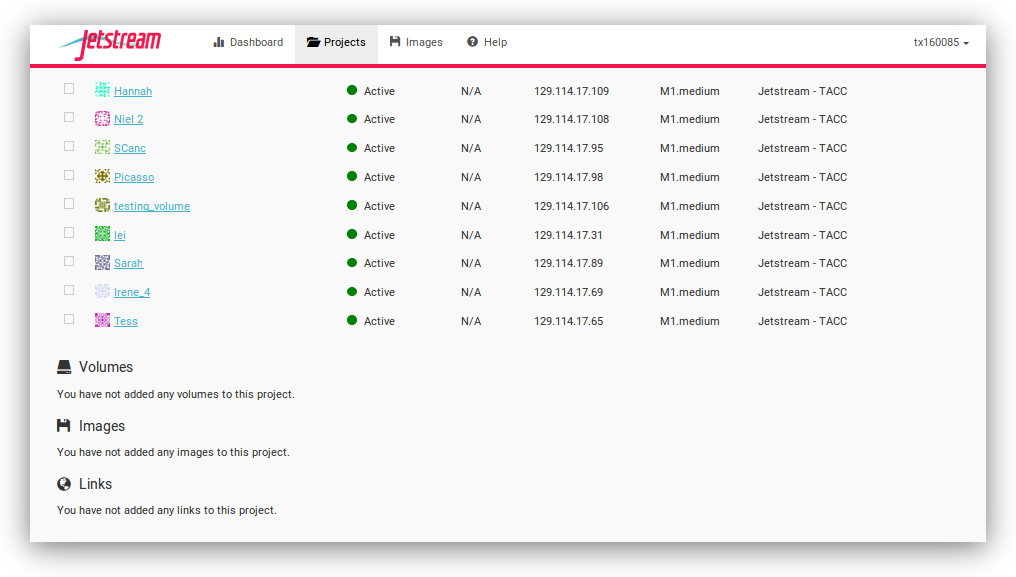
The ‘Status’ displayed on the webpage will change from a little yellow ball icon to green and list ‘Active’ along with an ‘IP Address’.
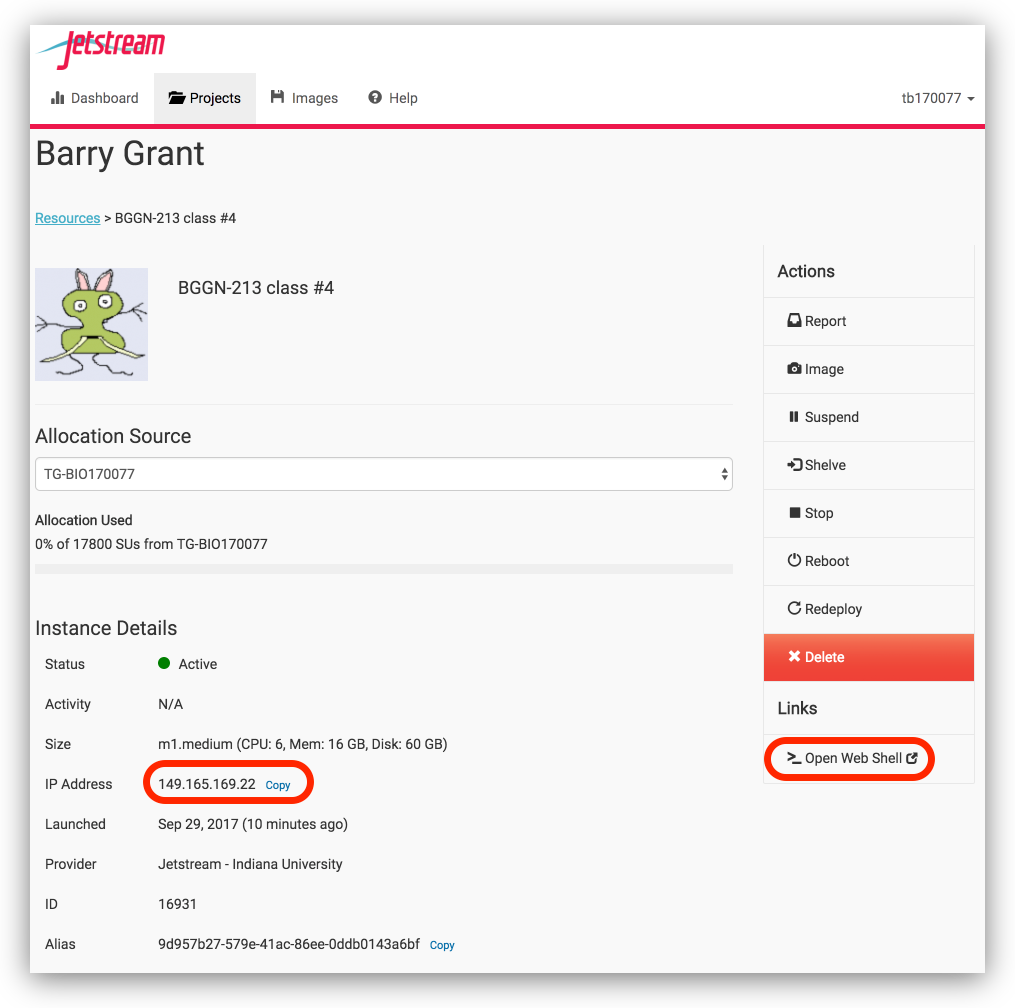
Click on your new instance to get more information!
Now, you can either click “Open Web Shell”, or, if you know how to use ssh, you can ssh in as user ‘tb170077’ on the IP address of the machine - see highlighted information below. Note that you’ll need to use the ssh key file we sent to you if you decide to use your system terminal. Please ask Barry about this if you are unsure about what you are doing here.
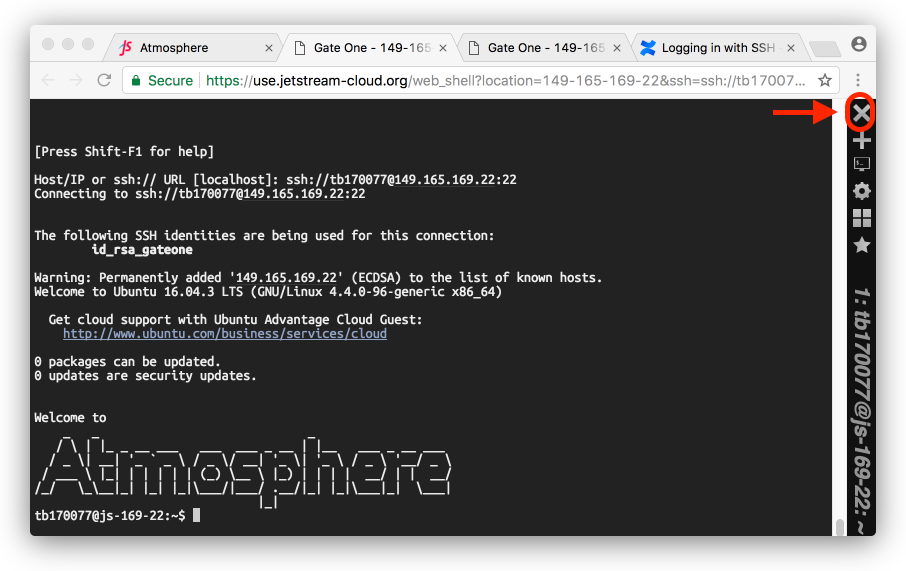
Using Open Web Shell
Upon clicking “Open Web Shell” a new web browser tab should open and log you in to your computer instance (see below). This will look like (and work some what like) a unix terminal (see below).
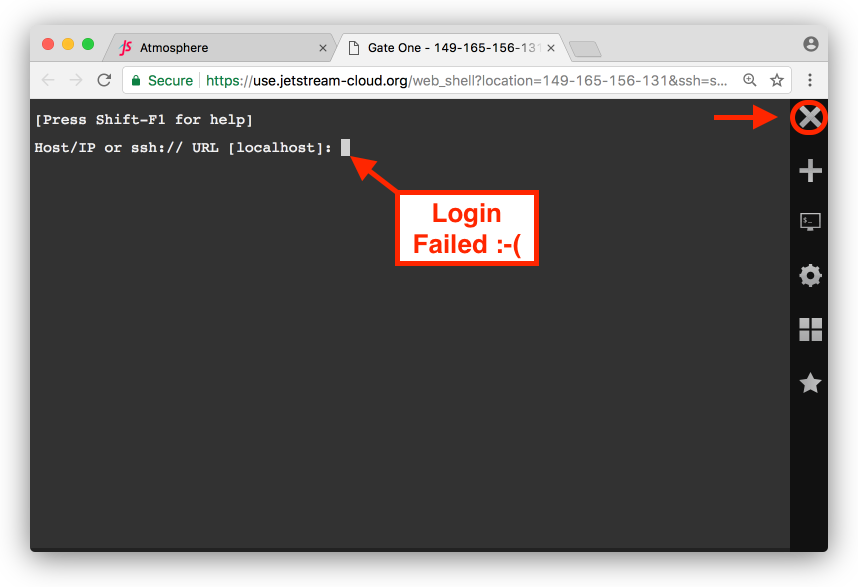
Occasionally, in my experience once in every four attempts, the web shell will not log you in (see below). In these cases click on the “X” on the top right side of the window to close the current session and then launch a new SSH terminal. You may have to repeat this close and open cycle several times. This is a known bug with Web Shell unfortunately.
Using your local terminal or mobaxterm
Some of us have had problems with the web shell and getting into the Jetstream portal. The instructions on this page will show you how to log in using an SSH key through your local terminal.
Miscellany
There’s a possibility that you’ll be confronted with this when you log in to jetstream:
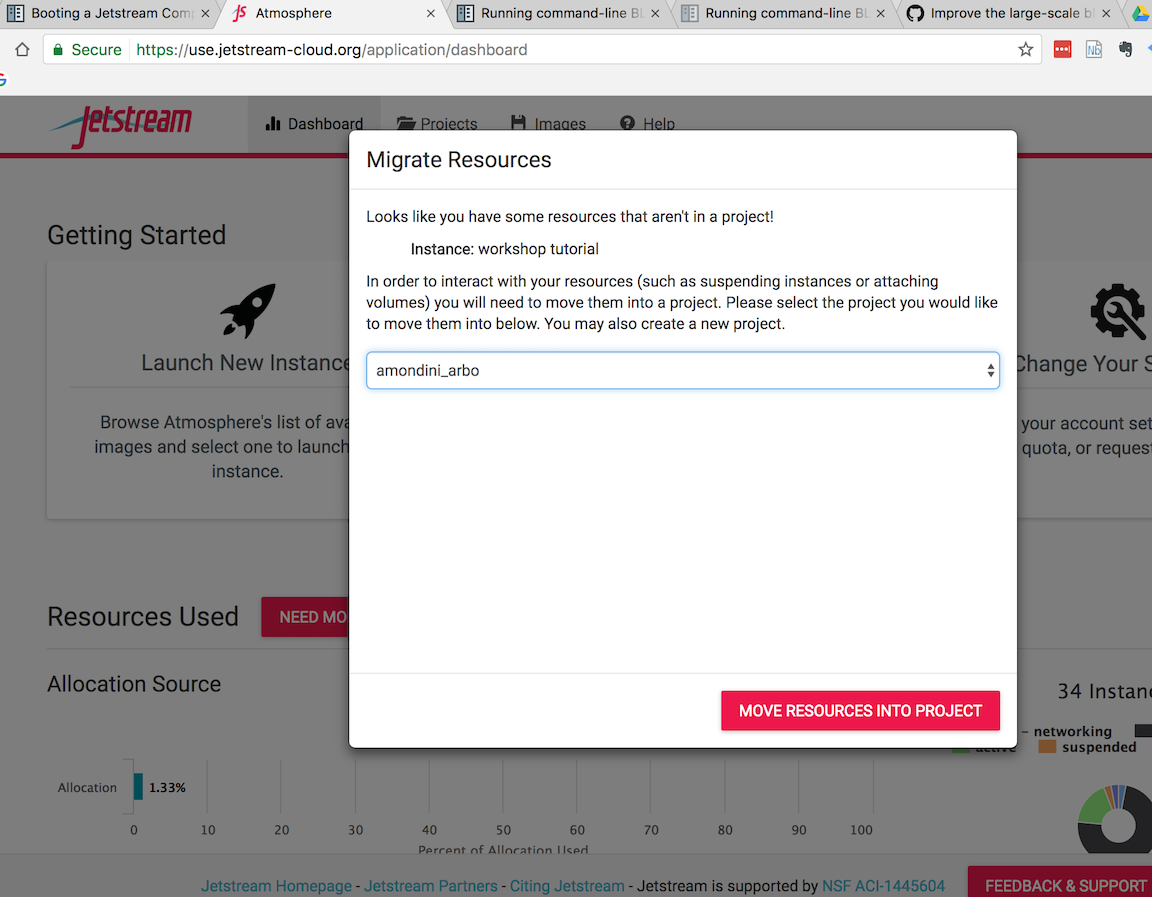
A refresh of the page should get you past it. Please try not to actually move any instances to a new project; it’s probably someone else’s and it could confuse them :)
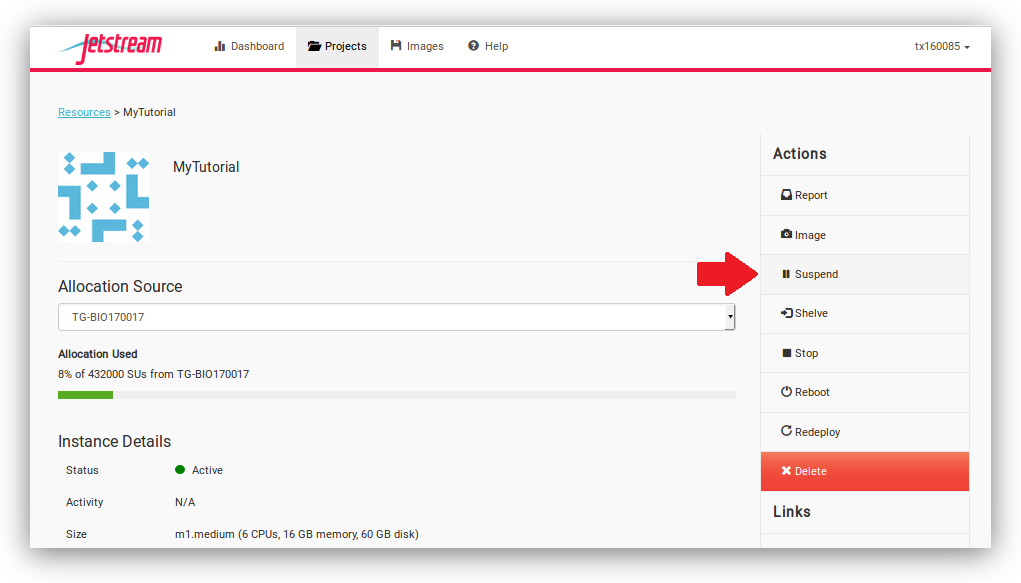
Suspend your instance
You can save your workspace so you can return to your instance at a later time without losing any of your files or information stored in memory, similiar to putting your physical computer to sleep. At the Instance Details screen, select the “Suspend” button.
This will open up a dialogue window. Select the “Yes, suspend this instance” button.
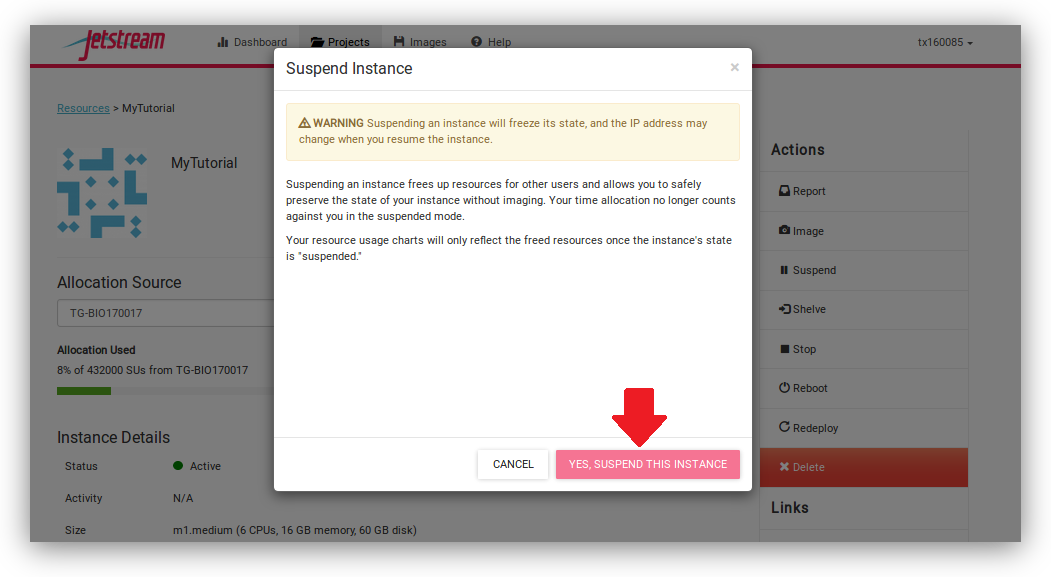
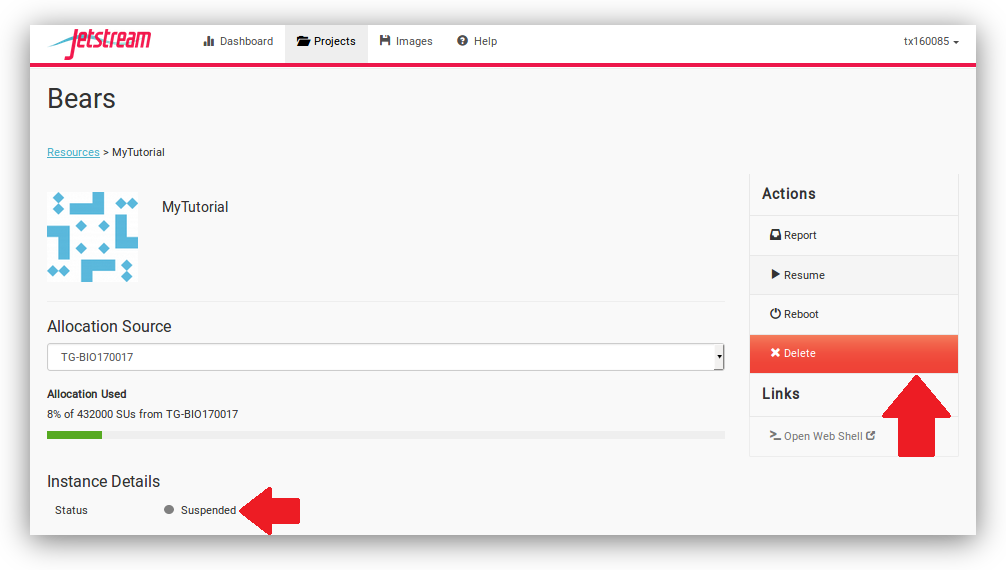
It may take Jetstream a few minutes to process, so wait until the progress bar says “Suspended.”
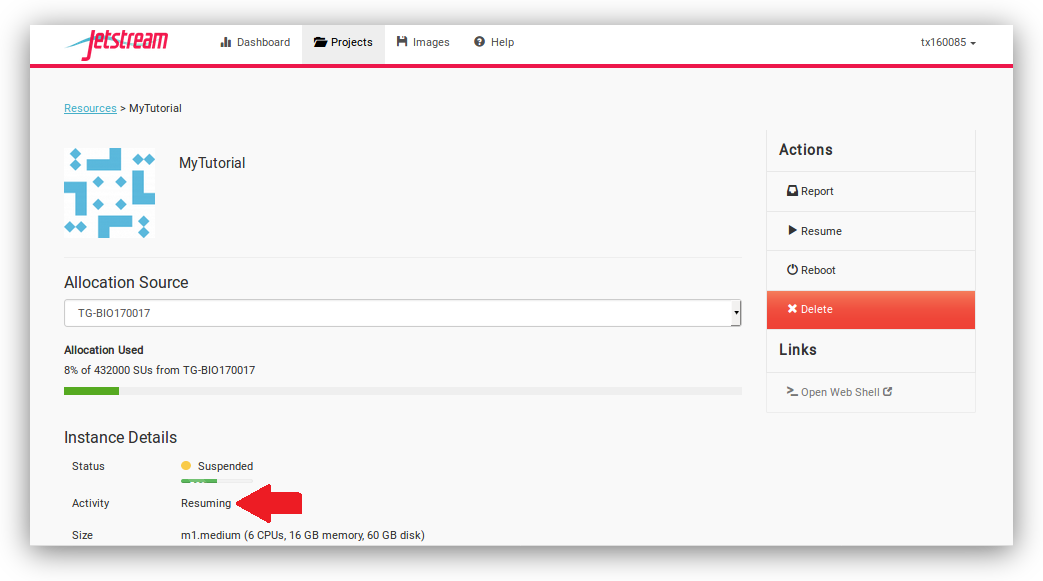
Resuming your instance
To wake-up your instance, select the “Resume” button.
This will open up a dialogue window. Select the “Yes, resume this instance” button.
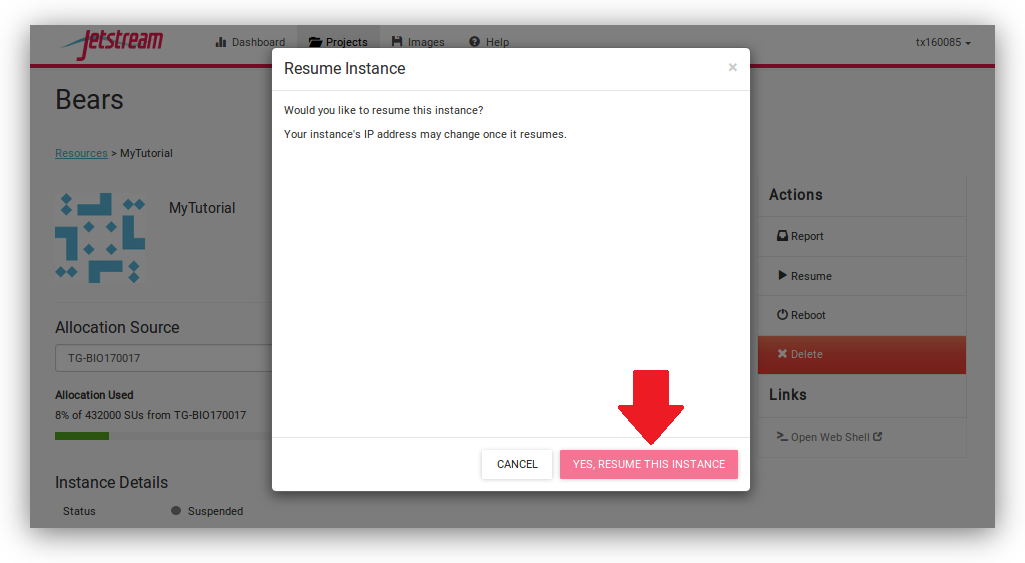
It may take Jetstream a few minutes to process, so wait until the progress bar says “Active.”
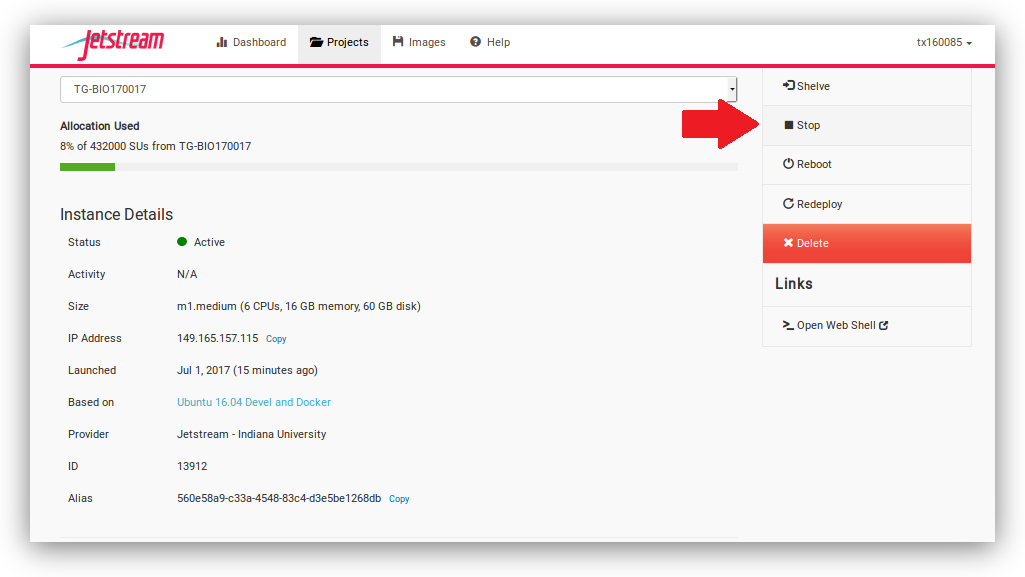
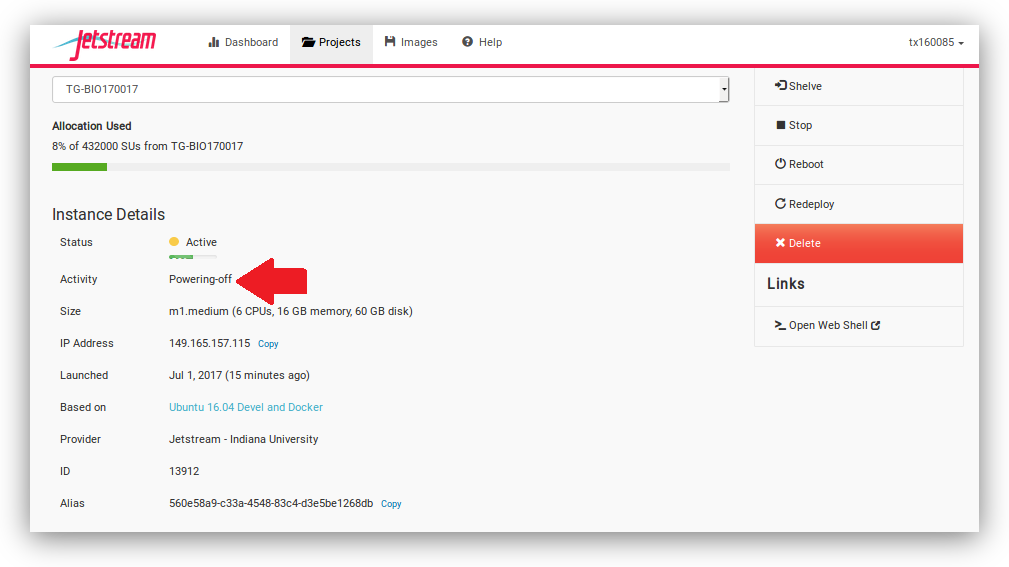
Shutting down your instance
You can shut down your workspace so you can return to your instance another day without losing any of your files, similiar to shutting down your physical computer. You will retain your files, but you will lose any information stored in memory, such as your history on the command line. At the Instance Details screen, select the “Stop” button.
This will open up a dialogue window. Select the “Yes, stop this instance” button.
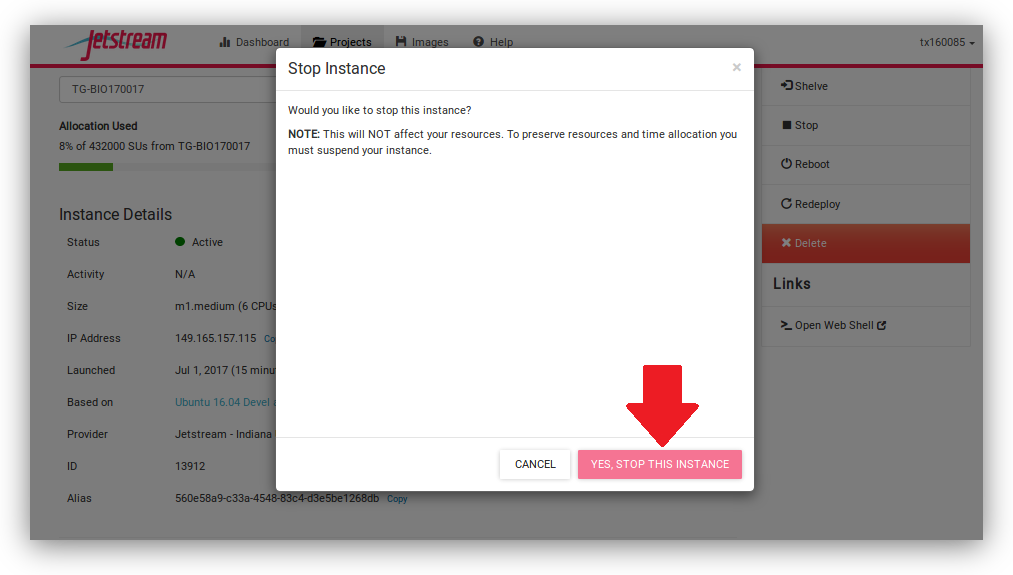
It may take Jetstream a few minutes to process, so wait until the progress bar says “Shutoff.”

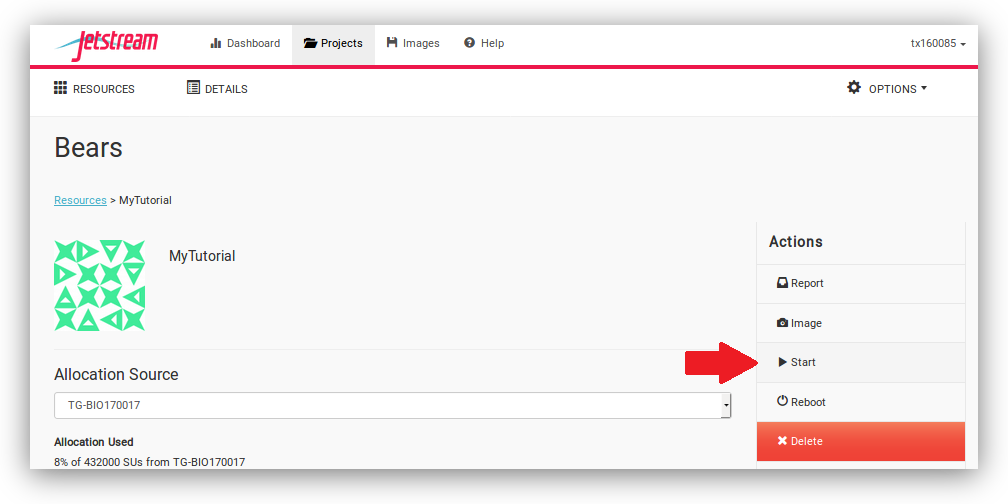
Restarting your instance
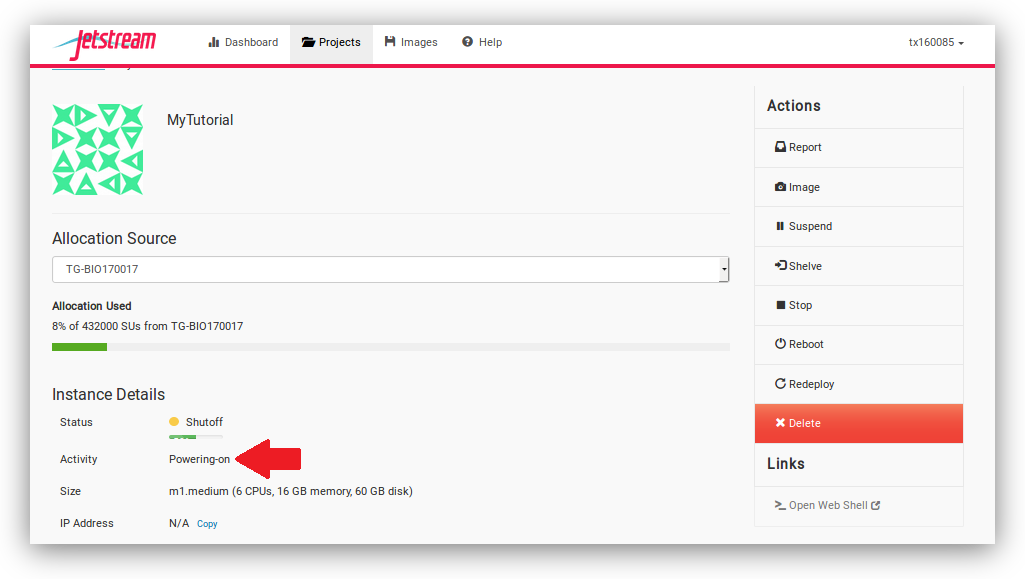
To start your instance again, select the “Start” button.
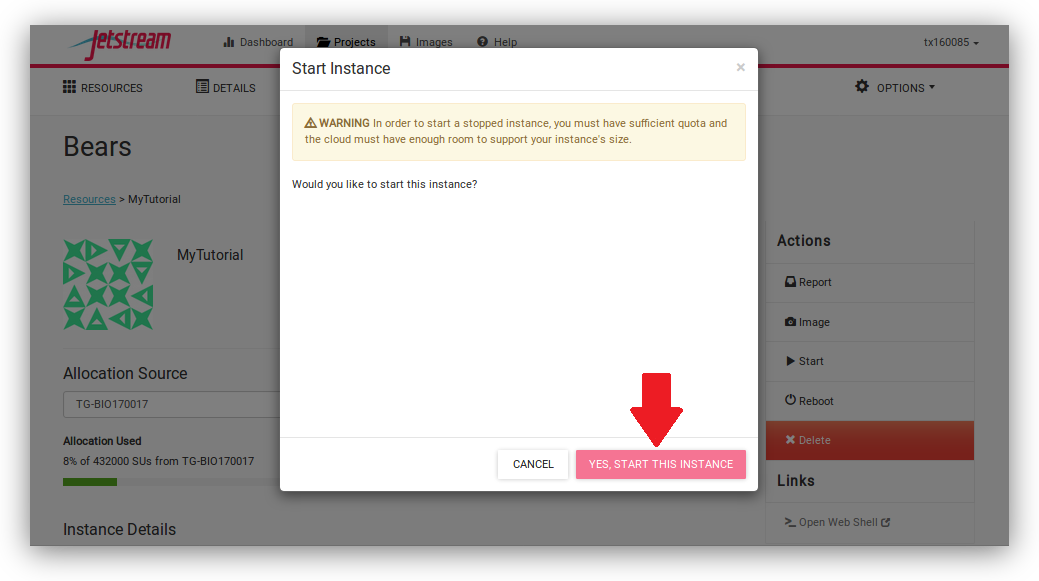
This will open up a dialogue window. Select the “Yes, start this instance” button.
It may take Jetstream a few minutes to process, so wait until the progress bar says “Active.”
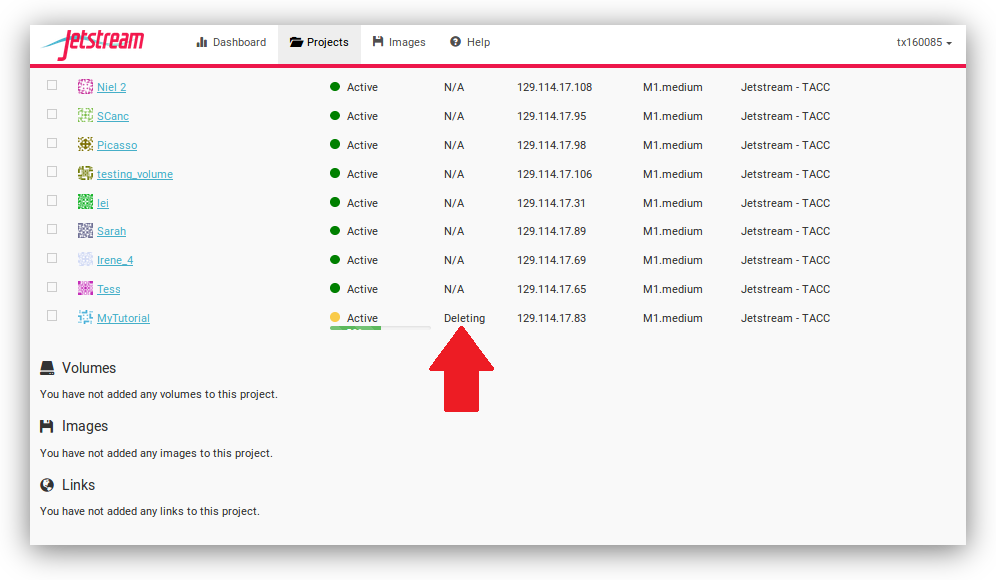
Deleting your instance
To completely remove your instance, you can select the “delete” buttom from the instance details page.
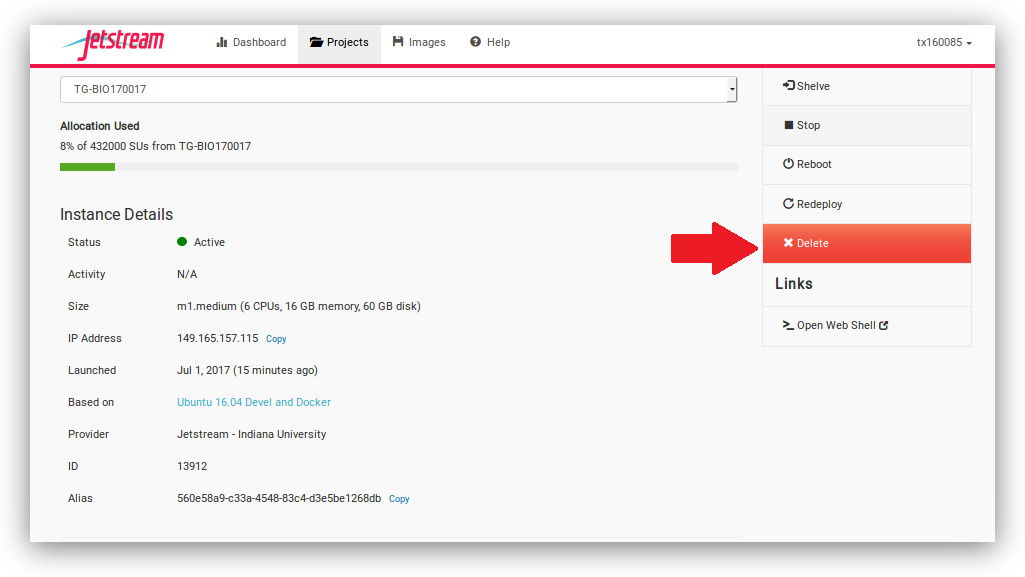
This will open up a dialogue window. Select the “Yes, delete this instance” button.

It may take Jetstream a few minutes to process your request. The instance should disappear from the project when it has been successfully deleted.